
Segments can play an important role in structuring and organizing your platform. By utilizing segments, you have the ability to categorize activities and members. This functionality serves multiple purposes including generating reports, effectively navigating the platform, and restricting access to activities to specific member groups.
Segments are customizable member fields which can represent the various branches of your company, such as different business units or departments. Additionally, consider Social Development Goals, brands, or partners as other potential segments to categorize and organize your platform.
You have the flexibility to add activities and members to a segment. Each segment can have its own dedicated page where you can add content and customize branding options.
Example business unit: if you want to analyze engagement by department, you will need to categorize your members based on their business unit. To do this, create a segment type called "Business Unit" and then create different segments such as Marketing, Sales, and Engineering. If you want members to be able to edit these segments in their profiles, you can set that up as well. If you would like these segments to be automatically added via the SSO, please contact our support team to begin the process.After the setup and implementation of segments, you will have the capability to choose this segment type in the backoffice reporting.
Example theme's:
How to create a segment
When setting up a segment, it is important to consider the following questions. It is advisable to think about these questions in advance or refer back to them during the process.
- What is the purpose of the segment? Will it be used to categorize users or activities? What type of segment do you intend to create, a member or an activity segment?
A member segment is used to categorize members, such as their office, department, or brand. On the other hand, an activity segment is used to categorize activities, like SDGs, partners, or activities related to temporary campaigns. - Is it useful for the segment to be displayed on the activity detail page as a clickable label?
- Do you want to activate the segment as a search filter?
-
Would you like to create an overview page for the segment?
-
How would you like to customize the branding of this page? Consider elements such as a slogan, story, logo, cover image, background, text, and button colors.
Member segments:
- Do you want the system to automatically create new member segments when a member logs in? Alternatively, would you prefer to only use pre-existing segments that you have set up?
- Should the member segment type be mandatory? In this case, members will be prompted to fill in their segment before they can continue using the platform.
- Would you like members to verify their segment type once it is filled via SSO? Please note that this feature only works if the "Required for members" option is enabled.
-
Do you want to allow members to edit the segments in their own profiles?
- Would it be beneficial for newly created activities to automatically adopt the segments of the activity creator?
- Do you want to automatically include members with a specific email domain in this segment?
- Do you want to restrict access to the segment so that it is only available to members who belong to that specific segment?
Create your segment type
Now that you have gathered the necessary information, it is time to proceed with creating the segments. You can find the Segments settings in the left menu of the backoffice.
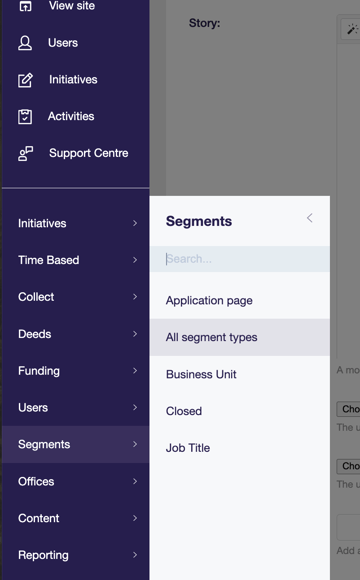
If you cannot locate this menu option, please contact Support for assistance in enabling it.
Here, you will find an overview of all the segment types available and the option to create a new one. Simply click on the "Add segment type" button located in the top right corner.

To create your segment type, provide a name and check the relevant boxes, as mentioned before.
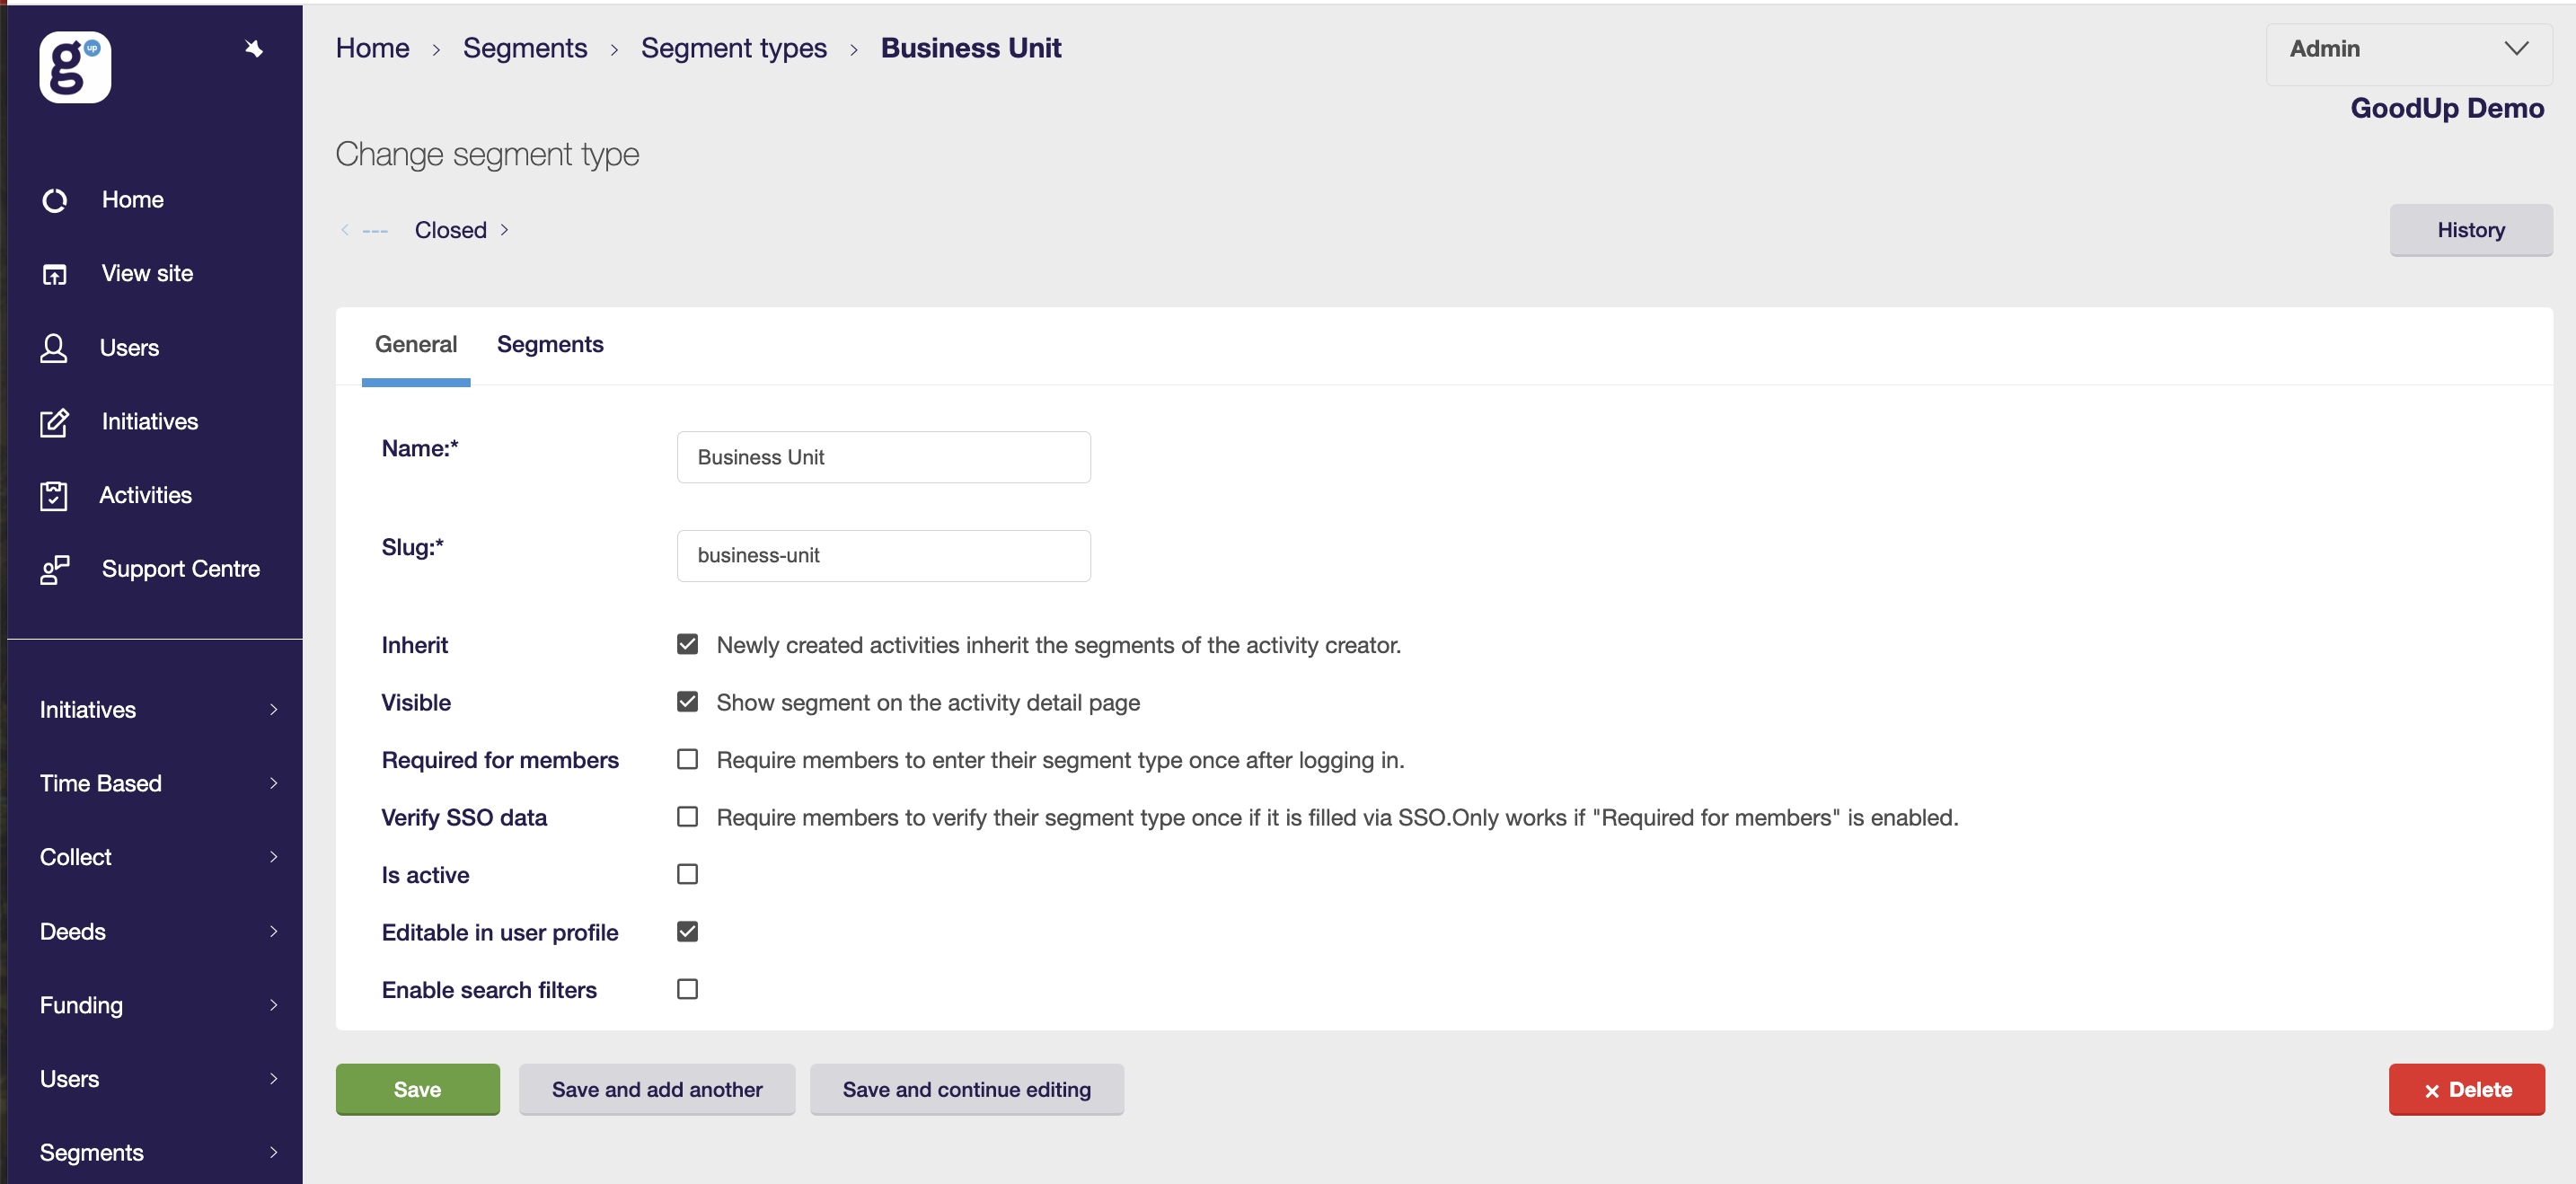
Create the segments
Label your various segments and add additional ones by selecting the +Add another Segment option.
After clicking on "Save and continue editing," you will have the opportunity to edit the various segment settings and customize the branding of the segment page, if you choose to use it. Simply click on the pencil icon to make the necessary changes.
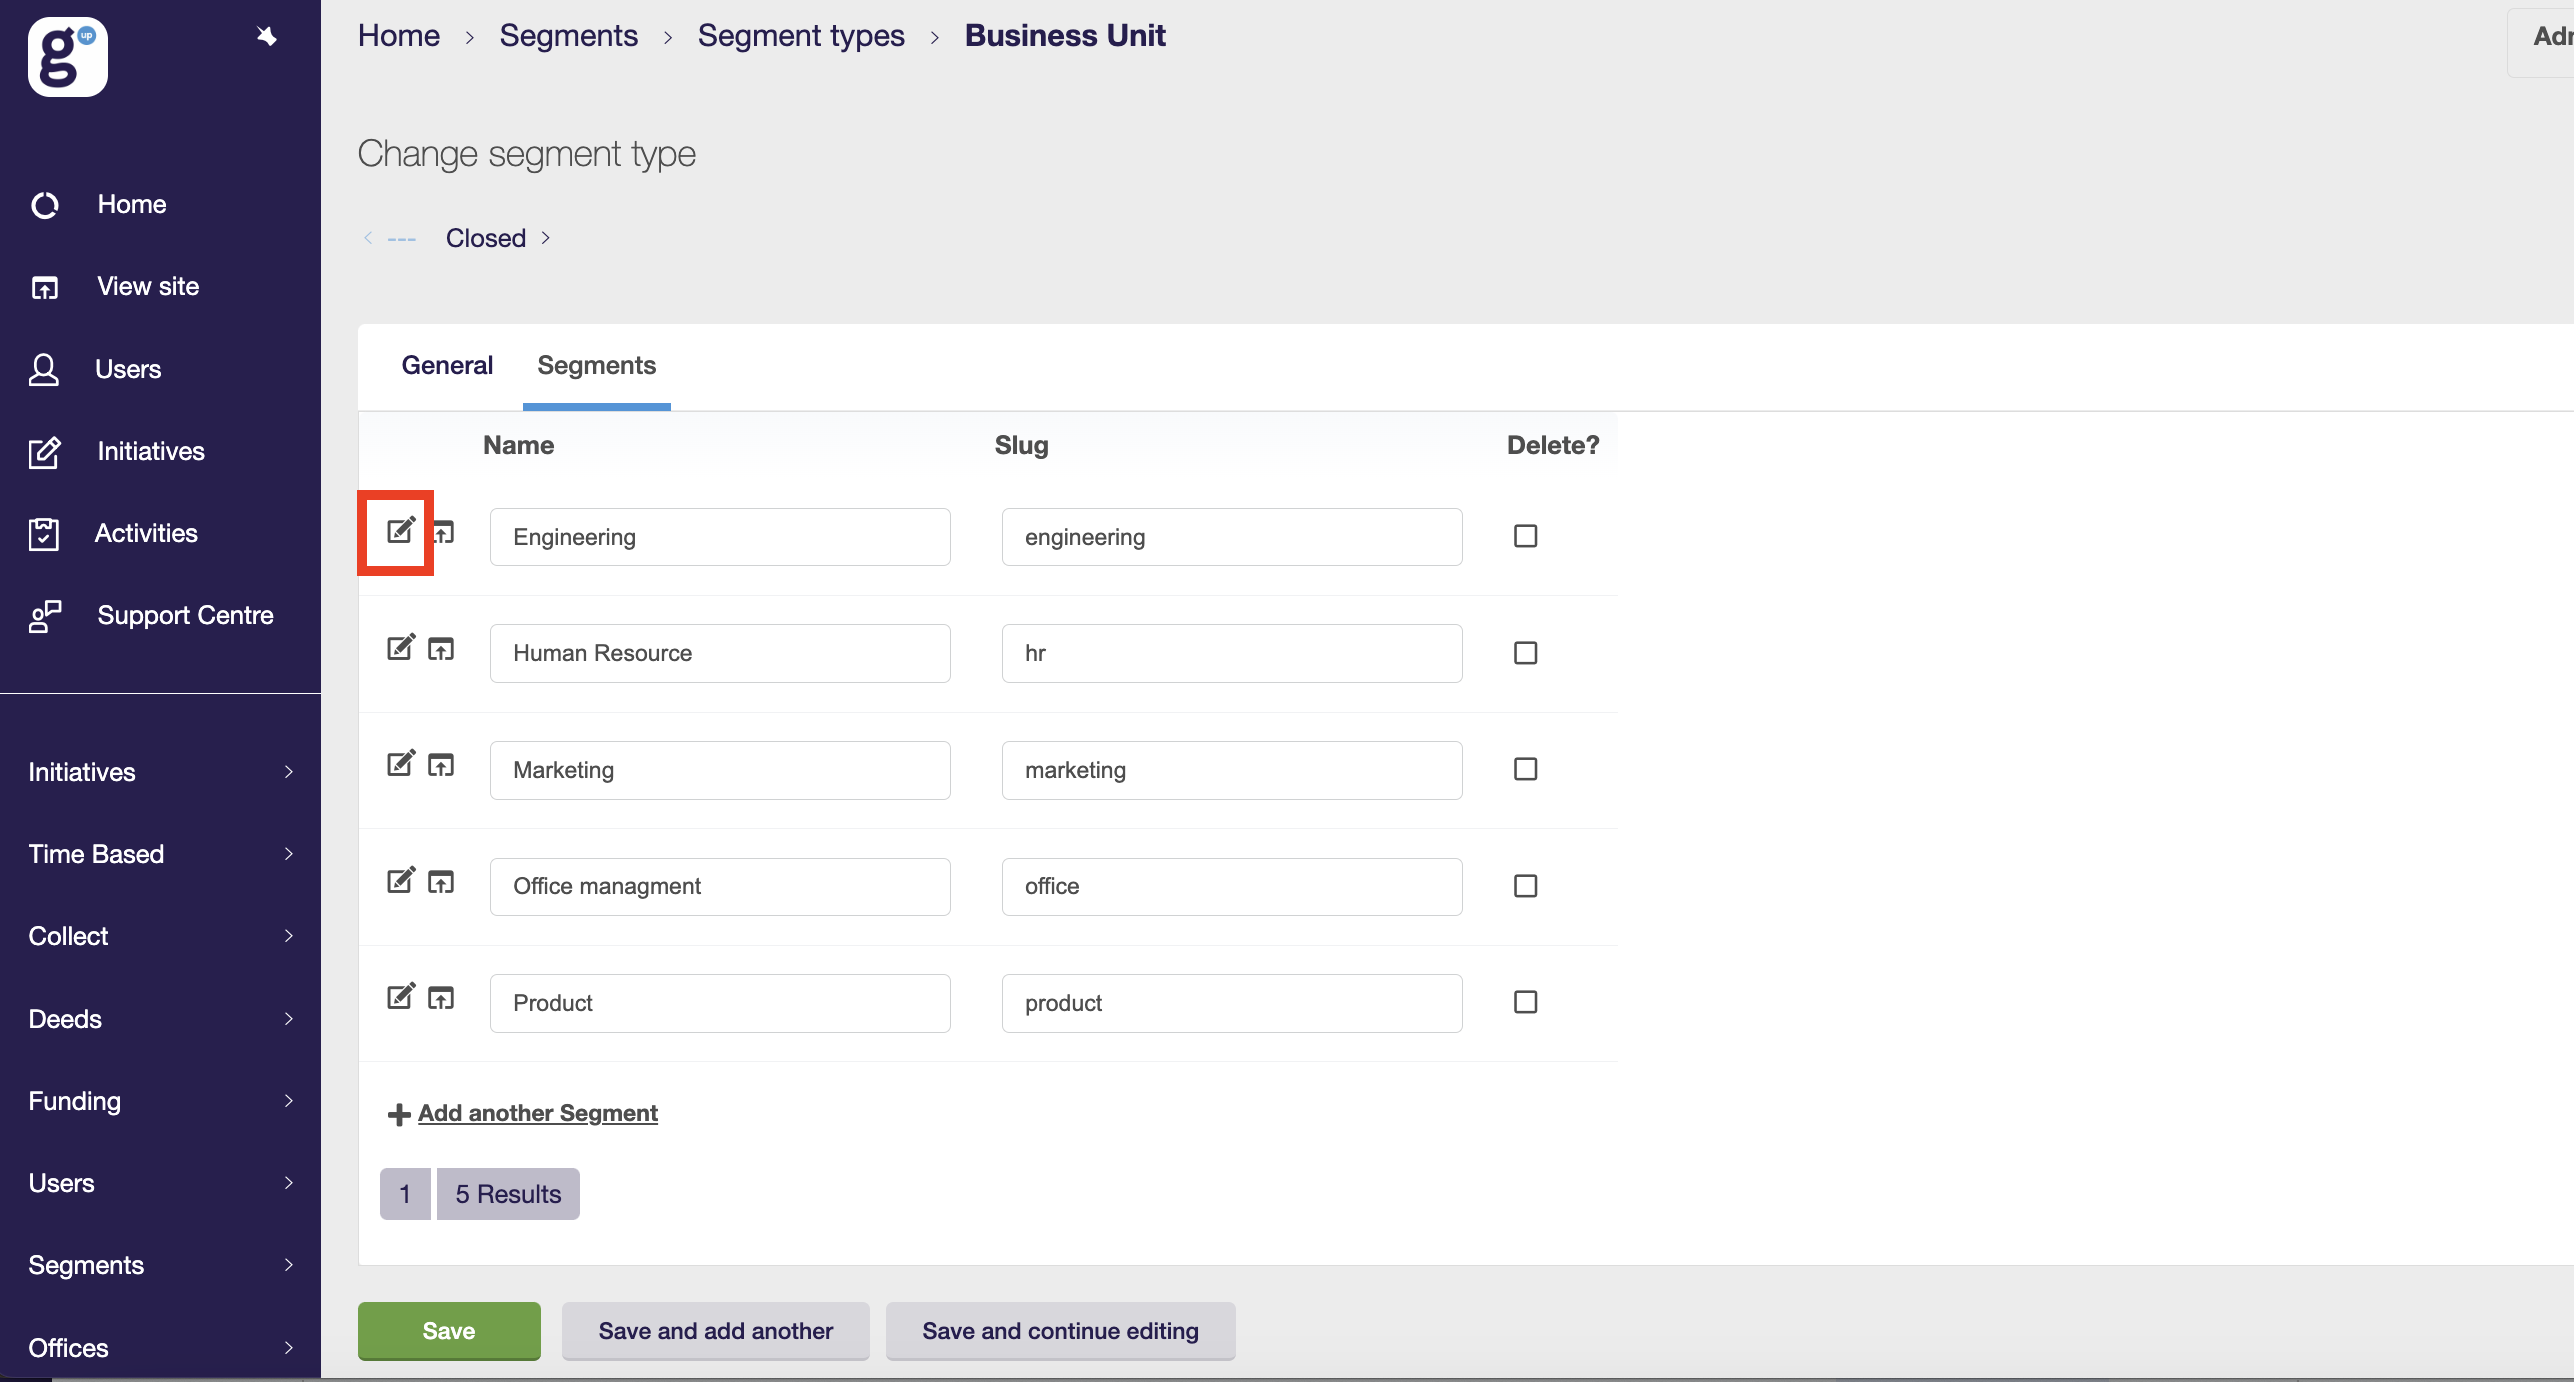
On the first General tab, you will find an overview of the general settings for this segment. If the segment is already active, you can conveniently view the number of associations it has, and by clicking through, you can see which activities and members are linked to it.
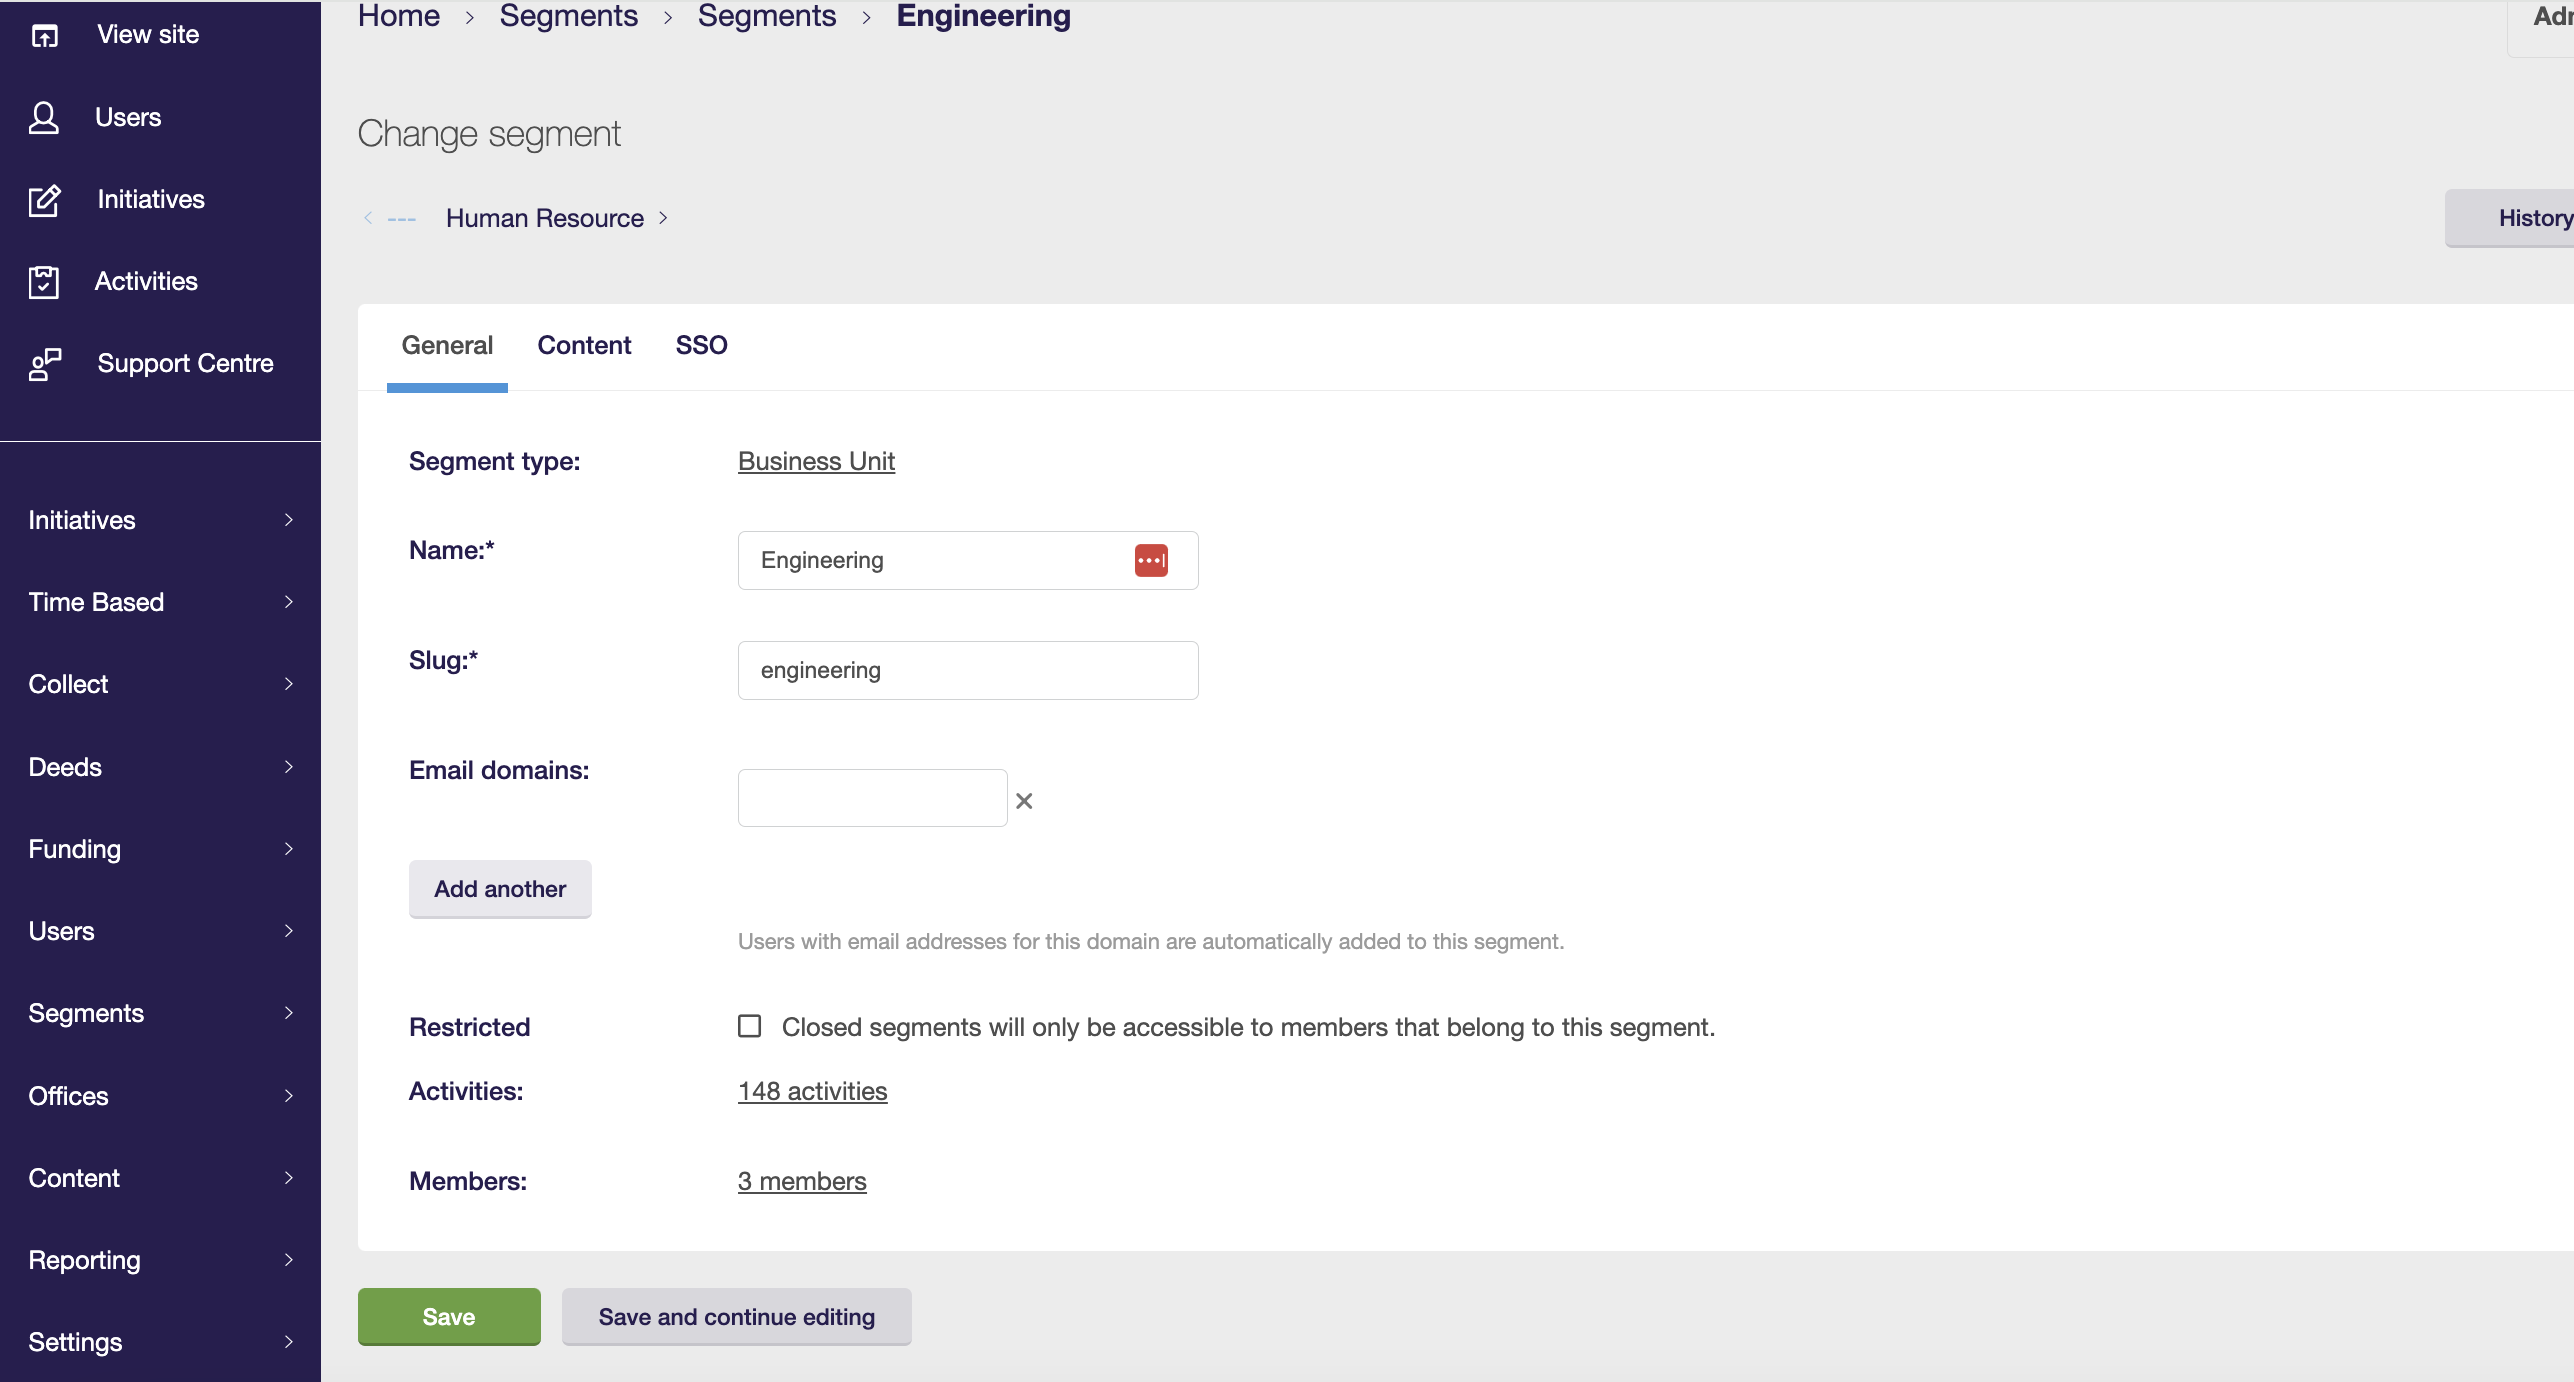
On the next tab, you will find the Content section where you can customize the branding of the segment page if you plan to use it.

After completing these steps, click on "Save and continue editing" to save your changes and preview the segment page on the front end.
Enable segments for members
To enable segments for members, access the Member platform settings. You can locate this option in the backoffice menu, under Settings. If you are unable to find this menu option, please reach out to Support for assistance in enabling it.
In the Profile tab, simply tick the box that says Enable segment and then click on Save and continue editing.
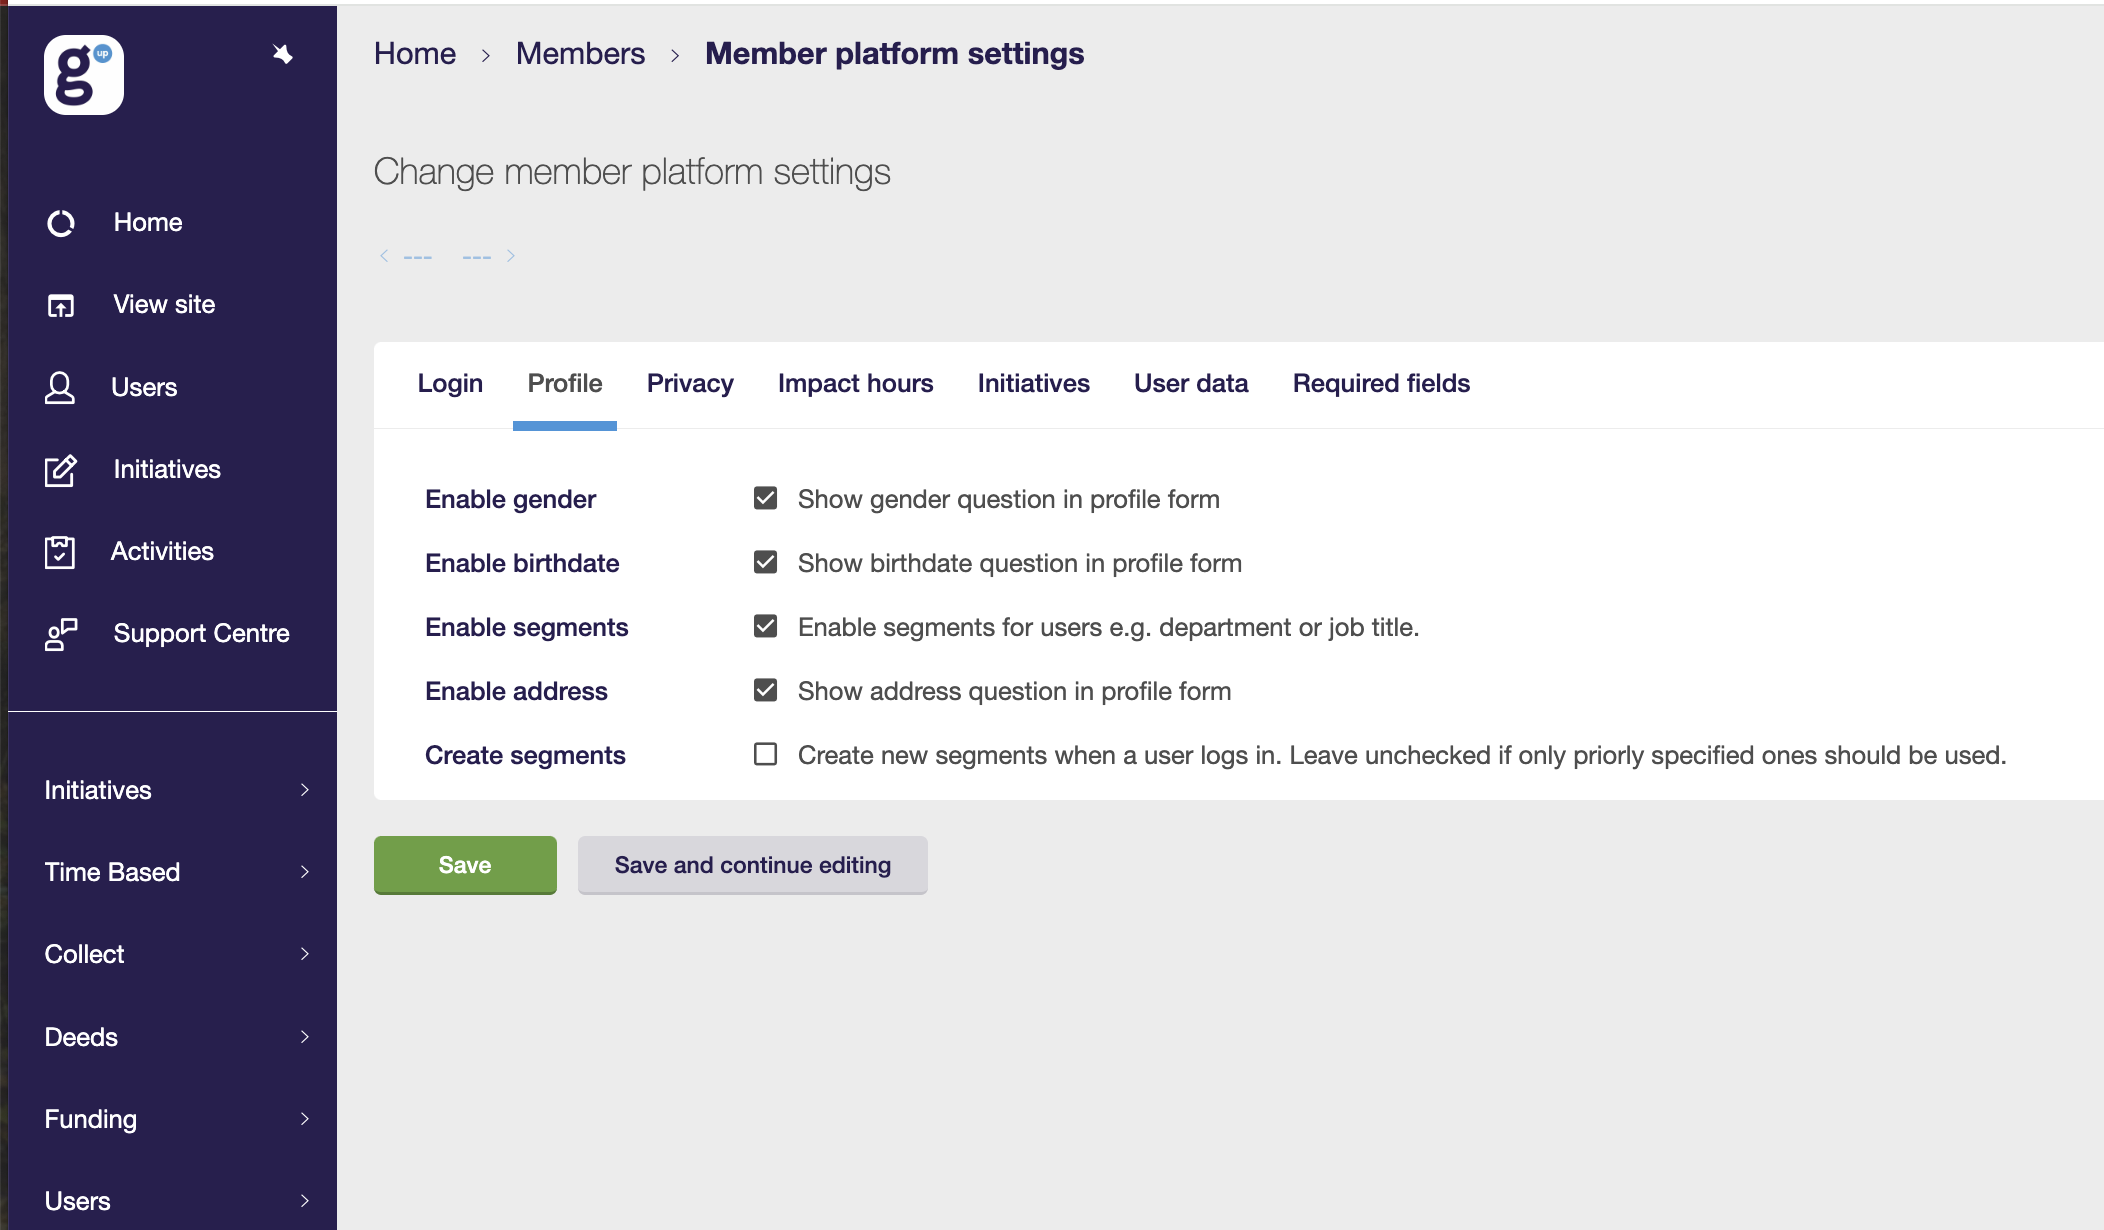
If you would like the system to automatically create new member segments when a member logs in, you can select this Create segments option. If you prefer to only use pre-existing segments, leave this box unchecked.